Claiming Your First Sensor
A physical Signal Vortex sensor needs to be "claimed" into your workspace before it starts reporting data. This is done with your phone or a webcam, by scanning a QR code printed on (or shipped with) the sensor.
The claiming flow
- Start — tap "Scan QR Code" from the sensor onboarding screen (reachable from Settings → Sensors, or the workspace setup confirmation step).
- Scan — your camera opens (rear camera preferred) and looks for the QR code. If the camera can't be accessed (permissions, no camera found, not on HTTPS), you'll see a specific error with a retry option.
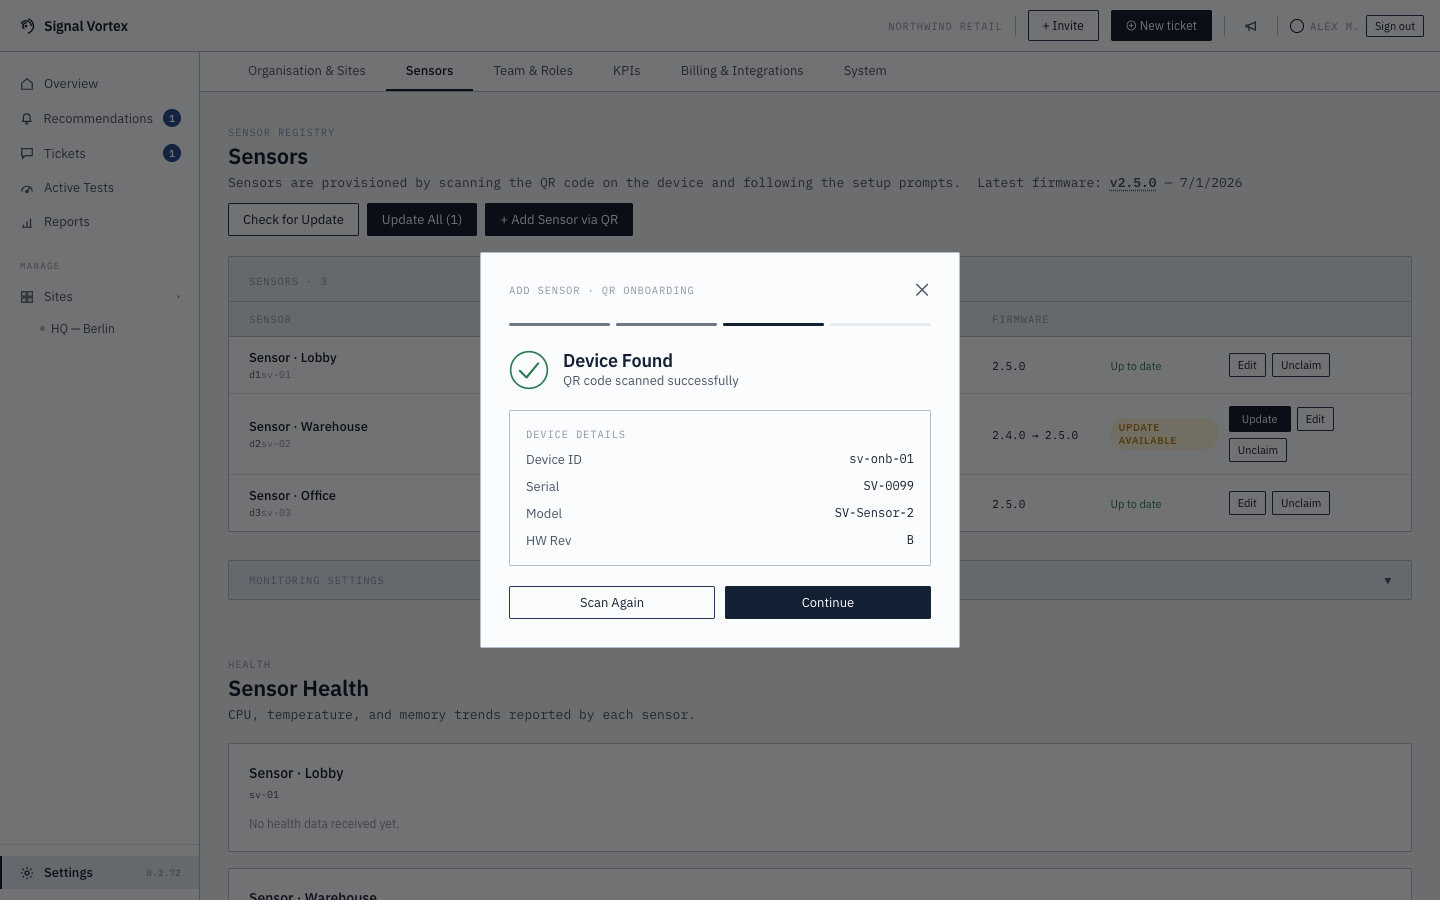
- Confirm device — once scanned, you'll see the parsed device details (device ID, serial number, model, hardware revision). Continue, or scan again if it's the wrong device.
- Choose a site and review config — optionally assign the sensor to a site, confirm/edit its activation code, and review which SSIDs it will be configured to listen on.
- Claiming — a short wait while the claim is submitted.
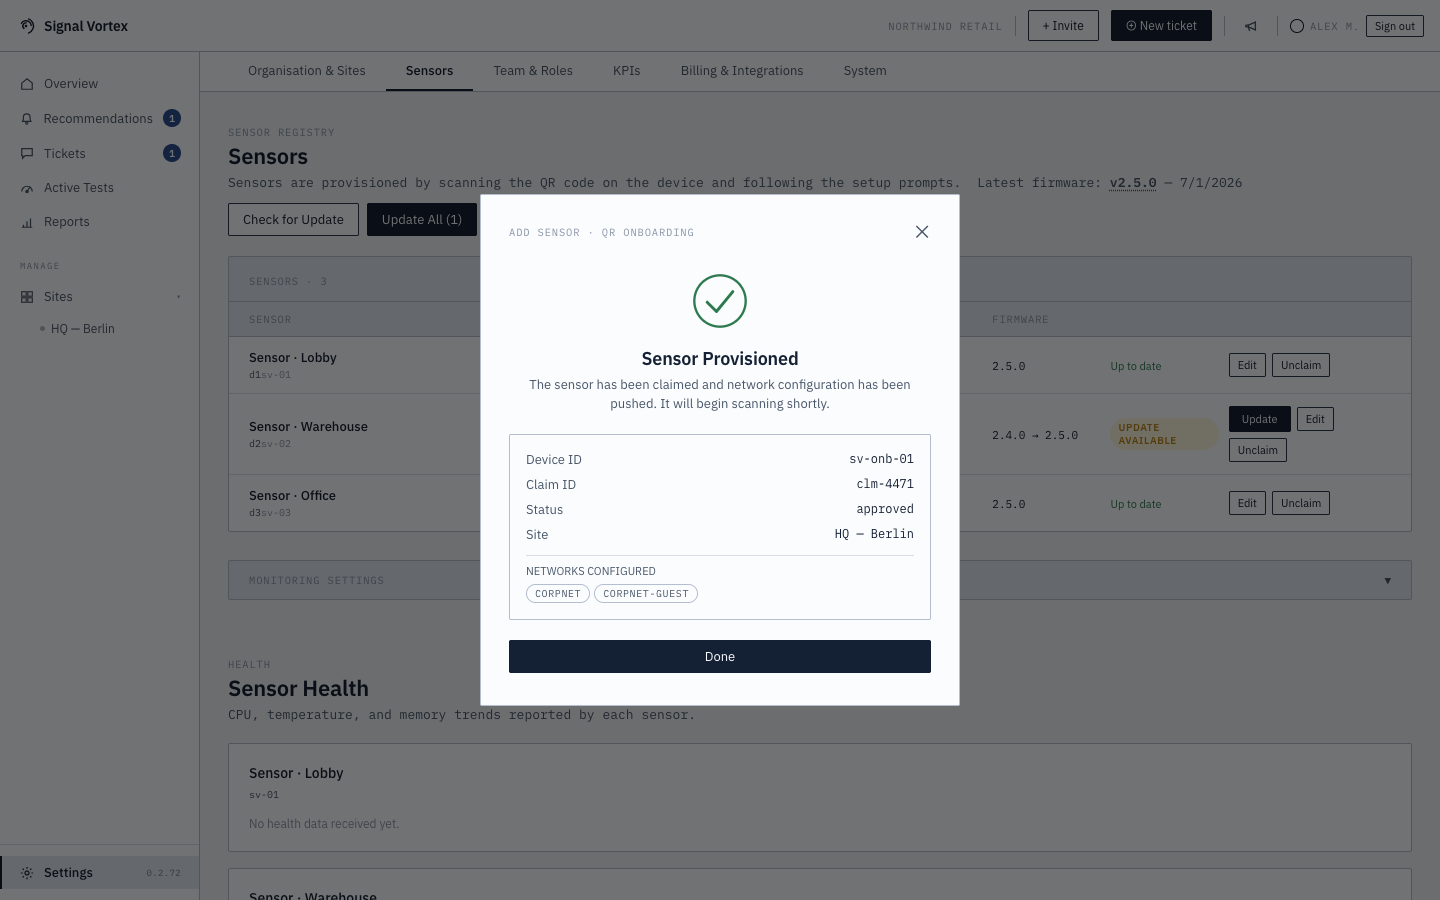
- Success — confirmation of the claim (device ID, claim ID, status, assigned site, configured SSIDs).
If claiming fails (sensor not found, handshake not completed yet, already claimed by another workspace, activation code mismatch), you'll get a plain-language explanation and a way to try again from the site-selection step.